The College Board now requires students be seated randomly (not alphabetically) during AP exams. The Seating Chart tool allows schools to Auto Assign Students to seats or drag-and-drop students to specific seats.
To create your seating chart, go to Report Center => Room Assignments/Seating Charts => Assign Students to Room, Create Seating Charts. NOTE: You must first assign students to rooms before you can create a seating chart.
Click the exam you want to create a seating chart for. The Assign Students to Room screen shows you rooms you have assigned to that exam, the minimum/maximum capacity for that room, and a list of each student registered for that exam plus any accommodations he/she has. You can also specify the number of rows and columns of seats for your seating chart on this screen. Be sure to click Save Row & Column when you update those fields.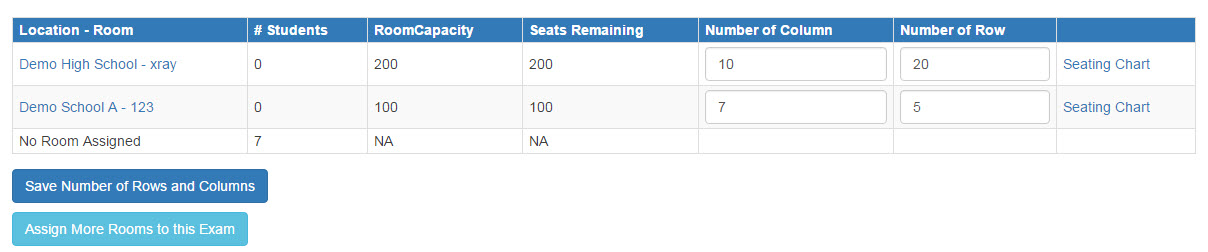
Click the Seating Chart link for the room for which you want to create the seating chart. On the Seating Chart screen, you can Auto Assign Students to seats or drag-and-drop students to specific seats. Click the Auto Assign Seats button to see all listed students randomly assigned seats beginning with the front row. You can still drag and drop those students to move a few of them around if needed.
If you'd rather seat each student in a seat of your choosing, you can drag and drop each student to a seat by clicking the student's name and holding the mouse button down while moving or dragging the student to an empty seat square and then releasing the mouse button.
Click the Save button to save the changes made to the seating chart.
You can click the Un Assign Seats button if you wish to start over with seat assignments.
NOTE: Student names highlighted in blue (for example, Carol Christmas in the above screenshot) are students who have had accommodations assigned to them. You can scroll over the student's name to see the assigned accommodations.